
Bridal bouquets are much more than a collection of flowers; they are a symbol of the bride’s personal style and the emotions of the wedding day. Historically, bouquets have held various meanings and served as a form of expression through the language of flowers. Today, they continue to be a central element of wedding aesthetics, encapsulating the color scheme and theme of the ceremony, while also serving as a cherished keepsake of the special day for many brides.
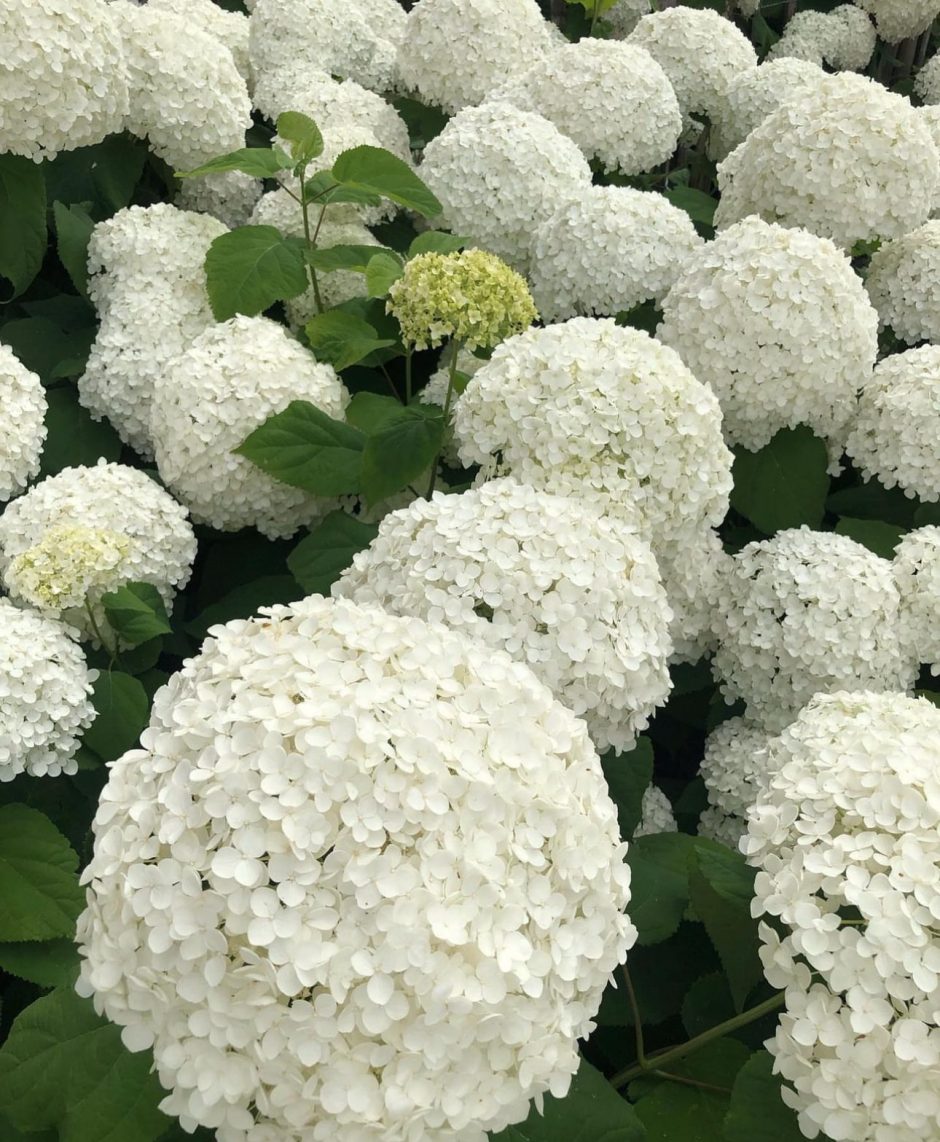
White hydrangeas, with their lush, snowball-like clusters of petals, exude an air of graceful elegance that makes them an ideal focal point for a bridal bouquet. These blooms are not only symbolic of purity and grace but also versatile enough to complement any wedding theme. In this DIY tutorial, we’ll harness the delicate beauty of white hydrangeas to create a bouquet that’s both timeless and effortlessly romantic.
Materials Needed:
- Fresh white hydrangeas
- Floral tape
- Floral wire
- Green florist’s tape
- Wide satin ribbon (Ivory or white)
- Scissors or gardening shears
- Pearl-headed pins
- A bucket of water
- Optional: Additional greenery or accent flowers (e.g., baby’s breath, eucalyptus)
Step-by-Step Instructions
Preparing the Hydrangeas
Selecting the best blooms is key to creating a stunning bridal bouquet. Look for hydrangeas with firm, full petals and avoid those with brown spots or wilted edges. Once you have made your selection, it is essential to condition the flowers to ensure they maintain their beauty throughout the wedding day. To do this, cut the stems at a 45-degree angle under water to promote water uptake. Remove all leaves that will be below the water level in your bucket, as they can decompose and encourage bacterial growth. Submerge the hydrangea stems in a bucket of cool, clean water and allow them to hydrate for at least an hour before assembling your bouquet. This conditioning process can significantly extend the vitality and appearance of your hydrangeas.

Constructing the Base
Creating a sturdy base for your bridal bouquet is essential to maintain its shape and structure. Begin by taking a piece of floral wire and gently insert it into the base of the hydrangea stem, being careful not to split or damage the stem. This will reinforce the natural stem and give you more control over the arrangement. Once wired, use the green florist’s tape to secure the wire to the stem, starting from the top and wrapping diagonally down to the end of the wire. Ensure the tape is tightly wound and smooth against the stem for a seamless look.
For additional support, group two or three hydrangea stems together and wrap them with more florist’s tape to form a stable, central cluster. This will be the foundation of your bouquet from which you will build outwards. The extra layer of tape helps maintain the desired shape of the bouquet, even when adding more stems and elements to your arrangement.
Remember to frequently handle the stems with care, especially as the bouquet grows in size and weight, to prevent any accidental breakage. With your base now constructed, you are ready to proceed with adding more flowers to your bouquet, shaping it into a symbol of beauty for the special day.
Assembling the Bouquet
Begin arranging your bouquet by adding hydrangeas to the central cluster one at a time. Hold the bouquet in one hand, and with the other, add each new stem at a slightly outward angle to start forming a dome shape. Rotate the bouquet as you work to ensure an even distribution of flowers all around. To maintain a rounded shape, place the stems so that the outer hydrangeas are slightly lower than the ones at the core. This provides a gentle, natural gradient that enhances the bouquet’s fullness and symmetry.
After adding each new flower, secure it with florist’s tape. This will keep the hydrangeas snugly together and prevent any individual stems from shifting or sticking out at an odd angle. It’s important to frequently step back and examine the bouquet from different sides, adjusting as needed to maintain a balanced look.
For a touch of whimsy and texture, optionally intersperse accent flowers or greenery among the hydrangeas. These can be woven into the gaps left between the hydrangea blooms to add depth and contrast.
Remember to check for any loose stems periodically and tighten the florist’s tape as required. Once all flowers are in place and the bouquet has reached your desired size and fullness, make a final wrap of tape around all the stems. This will lock everything in position, ensuring that your bouquet remains intact throughout the day.
The final step will involve finishing the handle and adding any personalized details, which we will cover in the next section of the tutorial.
Finishing Touches
Adding greenery or filler flowers is a wonderful way to create a stunning visual contrast within your bouquet and should be done thoughtfully. Choose greenery that complements the shape and color of the hydrangeas, such as soft sprigs of eucalyptus or ferns for a touch of green, or baby’s breath for a delicate filler. To incorporate them, tuck the stems of your accent greenery or filler flowers into the florist’s tape where they naturally fit between the hydrangeas. Be mindful of the balance as you go, both in terms of color and volume.
Once your bouquet is lush and visually balanced, it’s time to wrap the stems. Cut a piece of the wide satin ribbon to the desired length, with enough excess to cover the length of the stems and for a decorative bow or trailing ends, if you wish. Starting just below where the floral tape ends, wrap the ribbon snugly around the stems in a spiral motion moving downwards. When you reach the bottom, reverse direction, spiraling the ribbon back up to create a double layer for a more polished appearance. Once back at the top, secure the ribbon by inserting pearl-headed pins through the ribbon into the stems at an angle. For a seamless look, make sure the pins are evenly spaced and the heads of the pins are aligned.
Your bouquet is now almost complete. As an optional final touch, consider adding any additional decorative elements such as more pins, a brooch, or charms that have personal significance. This is also the perfect opportunity to trim the stem ends evenly to ensure they sit neatly when held. Your DIY white hydrangea bridal bouquet—with its personal touches and professional finish—is ready to grace the wedding aisle as an emblem of purity and everlasting love.

Additional Tips and Tricks
When contemplating color variations, hydrangeas come in a rich palette perfect for matching different wedding themes. For a classic, romantic look, soft pink or blush hydrangeas blend beautifully with traditional white. For more vibrant themes, consider blue or purple hydrangeas which can add a pop of color and depth to your arrangement. Autumnal nuptials might call for warmer tones such as deep reds and oranges. Always be mindful of the season and setting of the wedding to choose colors that will complement the overall aesthetic.
Regarding transportation and storage of your bouquet, it’s critical to keep it fresh and vibrant before the ceremony. After assembling, store the bouquet in a cool, dry place away from direct sunlight to prevent wilting. If possible, keep the stems in a shallow amount of water to allow the hydrangeas to drink and remain hydrated. On the day of the wedding, transport the bouquet upright in a vase or a bouquet holder with a moisture source to ensure it stays fresh. To avoid any damage during transport, keep the bouquet secured in a box that fits snugly around it and provides a cushion to absorb any jolts or bumps.

As you embark on this journey of creating your own bridal bouquet with fresh-cut hydrangeas from Whole Blossoms, remember that each stem you place holds the promise of your unique touch, reflecting the sincerest expression of your love and commitment. Take pride in each twist and turn of floral tape, for it weaves together the story of your devotion. This is not just a bouquet, but a heartfelt emblem crafted by your own hands, an intimate souvenir of the joy that your special day brings. Trust in your creative spirit, and know that the beauty you assemble will be much more than the sum of its parts. Whole Blossoms supports you with the freshest hydrangeas, ensuring that every petal represents the freshness of your new beginning. Embrace this moment; your DIY creation will be as timeless and enduring as the love it celebrates.